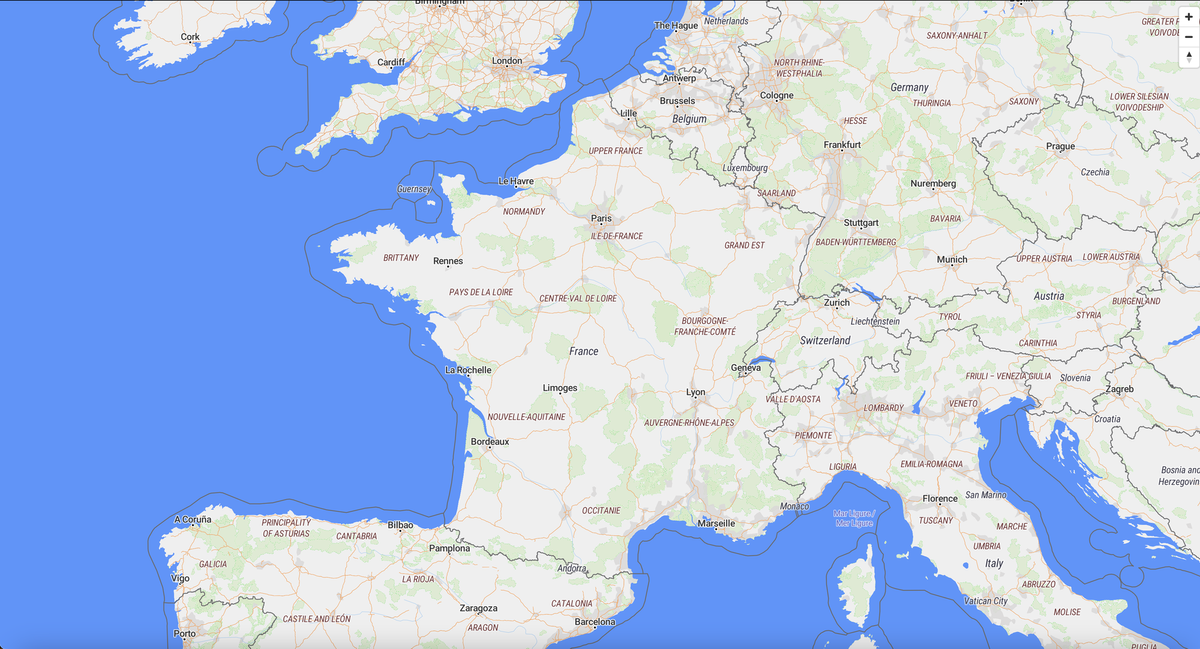
Host an Open Street Map (OSM) instance on Kubernetes with a custom style

Benefits of Self-Hosting OSM:
- Full Control: Customize map design, data layers, and functionality to fit your needs.
- Tailored Branding: Create maps that reflect your style or brand identity.
- Data Ownership: Keep your map data private and secure.
- Cost Efficiency: Avoid recurring fees of third-party mapping services.
Summary
- Create a volume containing a planet mbtiles
- Create an
openstreetmapnamespace - Create the
planet-mbtiles-pvcPersistent Volume Claim (PVC) - Download the planet file inside the volume using an nginx image
- Create an nginx deployment
- Enter the nginx pod previously created
- Install the wget package
- Download the mbtiles planet vector
- Create an
- Design your own custom styles to fit your design
- Write the OSM Configuration File Overview
- Build the Dockerfile
- Project overview
- Expected Project Structure
- Build and push your Dockerfile image to your private registry
- Create the OSM instance deployment
I - Create a volume containing a planet mbtiles
To host your own OpenStreetMap server, you'll need map data in the form of an MBTiles file, which contains pre-rendered map tiles. A popular option is the planet.mbtiles, which includes map data for the entire world.
Step 1: Create an openstreetmap namespace
In the following code block we create the openstreetmap namespace yaml:
apiVersion: v1
kind: Namespace
metadata:
  name: openstreetmap
Then apply that yaml:
kubectl apply -f namespace.yamlStep 2: Create the planet-mbtiles-pvc Persistent Volume Claim (PVC)
In the following code block we create the planet-mbtiles-pv openstreetmap persistent volume yaml:
apiVersion: v1
kind: PersistentVolumeClaim
metadata:
  name: planet-mbtiles-pvc
  namespace: openstreetmap
spec:
  accessModes:
    - ReadWriteOnce
  resources:
    requests:
      storage: 115Gi
  storageClassName: longhorn
Then apply that yaml:
kubectl apply -f planet-mbtiles-pvc.yamlStep 3: Download the planet file inside the volume using an nginx image
In this step, we will download the OpenStreetMap planet file directly into the Kubernetes volume where our map tiles will be stored. Instead of downloading the file manually to your local machine and then transferring it, we streamline the process by using an nginx container deployed on Kubernetes.
This allows us to directly pull the planet file into the mounted volume.
By doing this, we ensure the file is stored in the correct location for our OpenStreetMap server and avoid unnecessary data transfers. The nginx container will act as a simple environment for managing the file download.
Step 3-1: Create an nginx deployment
Create the download-planet.yaml:
apiVersion: apps/v1
kind: Deployment
metadata:
  name: download-planet
  namespace: openstreetmap
spec:
  replicas: 1
  selector:
    matchLabels:
      app: download-planet
  template:
    metadata:
      labels:
        app: download-planet
    spec:
      containers:
      - name: nginx
        image: nginx
        volumeMounts:
        - name: mbtiles-storage
          mountPath: /data/mbtiles
      volumes:
      - name: mbtiles-storage
        persistentVolumeClaim:
          claimName: planet-mbtiles-pvc
Then apply the file:
kubectl apply -f kubernetes/download-planet.yamlWatch the process until the pod state become Running :
kubectl get pods -n openstreetmap -w
NAME                               READY   STATUS    RESTARTS   AGE
download-planet-8467475dc9-ptpzr   1/1     Running   0          63s
Step 3-2: Enter the nginx pod previously created
When the pod status is Running enter the pod using:
kubectl exec -it -n openstreetmap download-planet-8467475dc9-ptpzr -- bashStep 3-3: Install the wget package
Inside the container update the package repositories using apt-get update :
root@download-planet-8467475dc9-ptpzr:/# apt-get update
Get:1 http://deb.debian.org/debian bookworm InRelease [151 kB]
Get:2 http://deb.debian.org/debian bookworm-updates InRelease [55.4 kB]
Get:3 http://deb.debian.org/debian-security bookworm-security InRelease [48.0 kB]
Get:4 http://deb.debian.org/debian bookworm/main amd64 Packages [8787 kB]
Get:5 http://deb.debian.org/debian bookworm-updates/main amd64 Packages [2468 B]
Get:6 http://deb.debian.org/debian-security bookworm-security/main amd64 Packages [188 kB]
Fetched 9232 kB in 2s (5105 kB/s)
Reading package lists... Done
Then install the wget package:
root@download-planet-8467475dc9-ptpzr:/# apt-get install wget -y
Reading package lists... Done
Building dependency tree... Done
Reading state information... Done
The following NEW packages will be installed:
  wget
0 upgraded, 1 newly installed, 0 to remove and 0 not upgraded.
Need to get 984 kB of archives.
After this operation, 3692 kB of additional disk space will be used.
Get:1 http://deb.debian.org/debian bookworm/main amd64 wget amd64 1.21.3-1+b2 [984 kB]
Fetched 984 kB in 0s (7689 kB/s)
debconf: delaying package configuration, since apt-utils is not installed
Selecting previously unselected package wget.
(Reading database ... 7580 files and directories currently installed.)
Preparing to unpack .../wget_1.21.3-1+b2_amd64.deb ...
Unpacking wget (1.21.3-1+b2) ...
Setting up wget (1.21.3-1+b2) ...
Step 3-4: Download the mbtiles planet vector
Generating the OpenStreetMap planet file from raw OSM data can be an incredibly resource-intensive and time-consuming process.
When we attempted to compile the file ourselves, the process took more than 3 days and still wasn’t completed.
This is due to the immense size of the data and the computational power required to process and render the entire world map.
Fortunately, while researching alternatives, I came across an amazing post by a Reddit user, Holocrypto, in the r/openstreetmap community.
Holocrypto has compiled and shared pre-built OpenStreetMap planet files, including regional data for Europe and the Netherlands.
You can find the original post and download the files for free here.
Inside the nginx container, download Holocrypto 2024-06-25-planet.mbtiles 83Gb file directly inside your mounted volume:
wget -O data/mbtiles/2024-06-25-planet.mbtiles https://osm.dbtc.link/mbtiles/2024-06-25-planet.mbtilesroot@download-planet-8467475dc9-ptpzr:/# wget -O data/mbtiles/2024-06-25-planet.mbtiles https://osm.dbtc.link/mbtiles/2024-06-25-planet.mbtiles
--2024-10-15 11:31:54-- https://osm.dbtc.link/mbtiles/2024-06-25-planet.mbtiles
Resolving osm.dbtc.link (osm.dbtc.link)... 172.67.177.246, 104.21.72.85, 2606:4700:3033::ac43:b1f6, ...
Connecting to osm.dbtc.link (osm.dbtc.link)|172.67.177.246|:443... connected.
HTTP request sent, awaiting response... 200 OK
Length: 89642627072 (83G) [application/octet-stream]
Saving to: 'data/mbtiles/2024-06-25-planet.mbtiles'
data/mbtiles/2024-06-25-planet.mbtiles 1%[=> ] 1.59G 60.9MB/s eta 17m 34sWhen the download process is completed you can delete the download-planet.yaml
II - Design your own custom styles to fit your design
With Maputnik, you can fully customize every aspect of your OpenStreetMap instance, from colors and labels to layers and fonts. This powerful, open-source visual editor allows you to easily design your map style without needing to write code. Once you've made your modifications, you can export the style as a style.json file, which is ready to be used in your OSM server.
In our case we saved the files at ./styles/ism_style.json
III - Write the OSM Configuration File Overview
This OSM configuration file defines important settings for your OpenStreetMap instance. It specifies the path to the data, the image format quality, and the maximum zoom level. It also integrates your custom map style, which is referenced by the ism_style.json file you created using Maputnik. Additionally, it sets the source of your map data, pointing to the planet.mbtiles file for serving vector tiles.
Create the ./config.json file and add the following:
{
    "options": {
      "paths": {
        "root": "/data"
      },
      "formatQuality": 80,
      "maxZoom": 18
    },
    "styles": {
      "custom-style": {
        "style": "styles/ism_style.json",
        "tilejson": {
          "tiles": ["http://localhost:8080/data/{z}/{x}/{y}.pbf"]
        }
      }
    },
    "data": {
      "osm": {
        "mbtiles": "mbtiles/2024-06-25-planet.mbtiles"
      }
    }
  }
VI - Build the Dockerfile
Create a Dockerfile and add the following:
FROM klokantech/tileserver-gl

WORKDIR /data

COPY ./styles/ism_style.json /data/styles/ism_style.json

COPY config.json /data/config.json

EXPOSE 80

CMD ["tileserver-gl", "--verbose", "/data/config.json"]
VI - Project overview
Expected Project Structure
After completing the setup for hosting your OpenStreetMap instance with custom styles, your project directory should look like this:
.
├── Dockerfile
├── README.md
├── config.json
├── kubernetes
│   ├── download-planet.yaml
│   ├── namespace.yaml
│   ├── planet-mbtiles-pv.yaml
│   └── planet-mbtiles-pvc.yaml
└── styles
    └── ism_style.json
- Dockerfile: Defines the Docker image to run your OSM instance.
- README.md: Documentation for setting up and using the project.
- config.json: Configuration file for the OSM server, including data paths and custom styles.
- kubernetes: Contains Kubernetes YAML files for creating the necessary namespace, Persistent Volume (PV), Persistent Volume Claim (PVC), and the process to download the planet file.
- styles/ism_style.json: The custom map style you created using Maputnik.
VI - Build and push your Dockerfile image to your private registry
Once your OpenStreetMap setup is ready, the next step is to containerize it by building a Docker image and pushing it to your private container registry. This allows you to easily deploy the container across your Kubernetes clusters.
Here’s how to build tag and push your Docker image:
Step 1: Build the Docker Image
Ensure you have the Dockerfile in the root directory of your project. You can build the Docker image using the following command:
docker build -t custom-osm-tileserver .
This command will create a Docker image based on the instructions in the Dockerfile.
[Optional] Step 2: Login to Your Private Registry
Before pushing the image, log in to your private registry:
docker login <your-registry>
Enter your credentials when prompted.
docker build -t custom-osm-tileserver .
Step 3: Tag the Docker Image
docker tag custom-osm-tileserver <your-private-registry-url.com>/custom-osm-tileserver:v1.0.0Step 3: Push the Docker Image
Once the image is built and you’re logged in, push the Docker image to your private registry:
docker push <your-private-registry-url.com>/custom-osm-tileserver:v1.0.0Step 4: Update Kubernetes Deployment to Use the New Image
After pushing the Docker image, ensure that your Kubernetes deployment is updated to use the new image from your private registry by modifying your deployment YAML file, specifying the new image in the container configuration:
containers:
- name: osm-server
  image: <your-registry>/<your-repo>:<tag>
With these steps, your custom Docker image will be stored in your private registry, ready to be pulled and deployed by Kubernetes.
VI - Create the OSM instance deployment
Now you just need to build a deployment that will load the file present in the volume:
apiVersion: apps/v1
kind: Deployment
metadata:
  name: open-street-map-instance
  namespace: openstreetmap
spec:
  replicas: 1
  selector:
    matchLabels:
      app: open-street-map-instance
  template:
    metadata:
      labels:
        app: open-street-map-instance
    spec:
      containers:
        - name: osm-server
          image: harbor.ultimsoft-cloud-engine.com/uce/custom-osm-tileserver:v1.1.2
          imagePullPolicy: Always
          ports:
            - containerPort: 80
              protocol: TCP
          volumeMounts:
            - mountPath: /data/mbtiles
              name: mbtiles-storage
      volumes:
        - name: mbtiles-storage
          persistentVolumeClaim:
            claimName: planet-mbtiles-pvc
      restartPolicy: Always
  strategy:
    type: RollingUpdate
    rollingUpdate:
      maxSurge: 25%
      maxUnavailable: 25%
  revisionHistoryLimit: 10
  progressDeadlineSeconds: 600
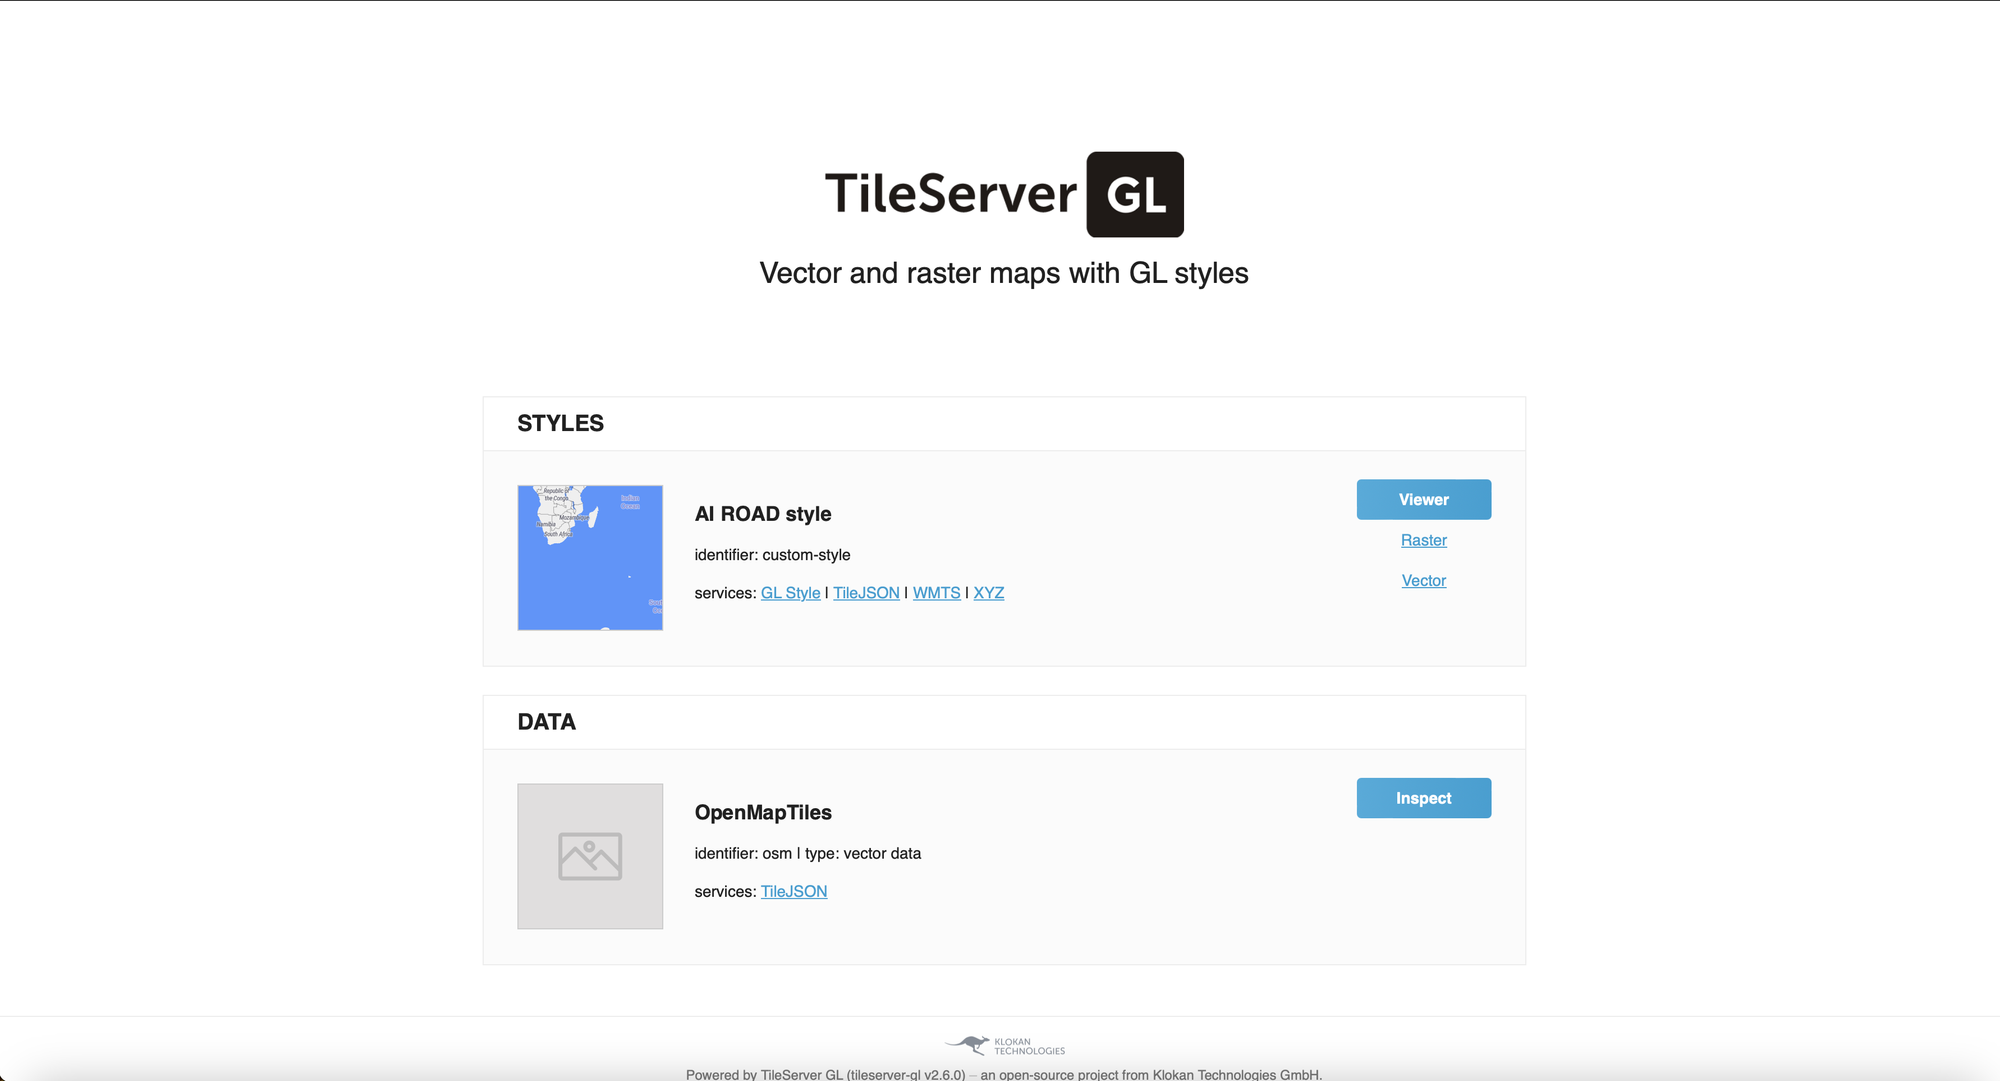
By going through your container port you will see this portal:

As you can see our custom style AI ROAD style is ready to be use. You can click on Viewer to try it live!


